Wednesday – Saturday July 21 – 24, 2021
Ikea Furniture Assembly
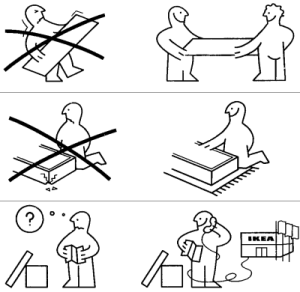
Have you ever received a bulk shipment of furniture and you have to clear out a room in order to set it up because everything is in the way? Then you get halfway through the build and you realize that half of the pieces are backwards. It’s no problem because it is easy to take apart and put back the right way its just a matter of time.
But you actually have responsibilities. You have a life. You have to eat. You might have kids. You have a blog to write. And then there is the question of the room you have cleared out so that you can assemble an extremely useful piece of equipment that will fully compensate you for the temporary inconvenience. It’s just that you have to do all this blindfolded.
Why? Because you’re inside a black box and there is a shim in your path. No, don’t move it out of the way. That’s a good sign it’s gonna work.
And that kernel in your notebook….were you eating popcorn during your study session last night? You really should be careful and keep your notes clean of food stains. No, dummy, that’s not popcorn, that’s so you can open your notebook in your chosen environment. (What?)
The important question is what flavor of python you prefer because now you can try them all. And, your stomach turns at that thought….that has never been a “thing” you have wanted. What is happening around here? Everything feels a little surreal. Well, this is all a sign that you have ventured deep into the into the dark forest of programming. Let’s hope your Hansel and Gretel have left their trail of bread crumbs or you may never come out alive.
Don’t forget! Weren’t you trying to assemble something?
My true first hand account, swear to God!
It has never taken me two weeks to assemble Ikea furniture. But to set up my environments from “scratch” without the help of conveniences like Conda….I wanted the least amount of extra clutter with maximum amount of control and modularity, all for the purpose of establishing a work flow that was simple enough to incorporate and use on a daily basis without inspiring laziness to creep in. It had to be simple and clear.
This, I finally got, and it took me two weeks. It was not easy and I was losing steam near the end. It seems also that I took an overly optimistic estimate of time it would take me but I finally got there. Unfortunately, I couldn’t do much else on any of my projects.
To my great relief and satisfaction, I have arrived and it is beautiful! So here it is.
My System: macOS Big Sur 11.4, 2019 MacBook Pro, with the zsh shell and Homebrew
(Other configurations of these might require slightly different solutions that can only be determined by you and the resources that you can research. I cannot provide en exhaustive or extensive prescription here, only steps that were specific to my system.)
Install pyenv:
- dependency: xcode (I already had it but check this resource to see if you have it installed and how to install it if you don’t)
- dependency:
brew install openssl readline sqlite3 xz zlib– source referenced here curl https://pyenv.run | bash(This installs in Users/{HOME}/.pyenv/plugins/ [pyenv-doctor, pyenv-installer, pyenv-update, pyenv-virtual, pyenv-which-ext]) – source referenced here- in your shell enter the next three lines to your
~/.zshrc(I am using zsh, if you use bash it will be~/.bashrc, but I don’t have to tell you that, do I?):echo 'export PYENV_ROOT="$HOME/.pyenv"' >> ~/.zshrcecho 'export PATH="$PYENV_ROOT/bin:$PATH"' >> ~/.zshrcecho 'eval "$(pyenv init --path)" ' >> ~/.zshrc
- now restart your shell
- check your PATH with
echo $PATH(you should expect to find /Users/{HOME}/.pyenv/shims:/Users/{HOME}/.pyenv/bin:/usr/local/bin:/usr/bin:/bin:/usr/sbin:/sbin and now you have a shim in your PATH) - if you enter
exec $SHELLyou will get an extra pair of pyenv directories added to you PATH each time. I don’t know how to avoid that at the moment, but you can remedy it by simply closing that terminal and start another one and PATH will revert to containing one pair of pyenv directories.
Commands for pyenv: source referenced here
pyenv install --list: shows you all the flavors of python you can samplepyenv install <version of python>: to install as many versions as you like….you can simply replace install with unistall if you want to do that.pyenv versions: if you don’t place the ‘s’ you will get the literal version of pyenv that is installed, however with the ‘s’ you will get a list of all the python versions that are installed on your pyenv and a star next to the activated version. This will be different based on what version you have activated and they change based on scope. You can check this whenever you change directories in case there is a local setting that changes the version.pyenv global <version of python>: will set a python version to the global scope which will be in effect outside of any directories that do not have a local settingpyenv local <version of python>: will set the local version of python in the cwdpyenv shell <version of python>: will create a python version setting for another level deeper but I don’t know if this is going to com into play with my setup. For the moment I am only going to concern myself with theglobalandlocalsettings.
Install pipx: this is for installing some packages that are useful tools that you want to use in every project but are not going to lean on the code you are writing to create dependencies. You want them available globally but you don’t want them installed globally. You should use pipx apparently. – source referenced here
brew install pipxpipx ensurepath: this will add another directory to your PATH
Install pipenv: source referenced here
pipx install pipenv
Commands for pipev can be found here, but I find that the only one I am using at the moment is pipenv install <package> and pipenv shell (this creates your environment). At some point after your environment is created you might want to remove that environment. These are the steps:
-
pipenv --rm -
rm Pipfile -
rm Pipfile.lock
Install jupyter lab:
pipx install jupyterlab
Work flow for new projects:
mkdir new_project && cd $_: a one liner that both creates the project directory and moves you into it.pipenv install ipykernel: add any other packages you would like here separated by spaces….it will take a long time to install and create Pipfile.lock and sometimes lock may fail. Don’t worry if it does, as long as the package installs you can remedy this later, though I haven’t found the answer yet (but there is a way). This step also creates the pipenv shell in your cwd.pipenv shell: you need to go into the shell to install the instance of the kernel from within the isolated environment you want to work in.python -m ipykernel install --name new_project: this will create the kernel(for the environment)that you will find in you notebook- You can exit the pipenv shell if you want the rest of the work flow does not depend on being in the specific shell
Once you do those steps you don’t have to repeat them. You can simply follow the next steps each and every time you want to work on this project
jupyter lab: you can open this in your home directory. Lab provides the ability to navigate through your directories and you can each notebook with any kernel you have created. The thing to remember is that the name of your project is the name of the directory which is the name of the kernel you want to select when you open a notebook. So, I will keep this open in my home directory and I can navegate to any directory/project and open a notebook I am working on.- select the kernel with the project name
- Once inside the notebook you can make commands to your shell with ‘!’. So, if you want to install a package you
!pipenv install pandas. But if you want to see the installed packages you enterpip list, you don’t need it here. Any other shell commands can go through ‘!’, such as!ls ~/new_project/dataif you want to see the contents of another directory.
(Question to investigate: If I install the ipykernel in pipx and then install each instance of the kernel in each pipenv shell, I wonder if I could skip step 2.)
As you can see, this took a lot of time. From diagnosing the sudden disappearance of my jupyter notebook package and all of my globally installed packages (ooo…globally….that will never happen again….lesson learned) to investigating what is happening within the system and what options are available to create a light weight package/environment management and finally to implement the solution I decided on and debug some problems.
I am tired but very happy with the results. Simple, easy, and clear. Compliance will be high if I only have to follow steps 6, 7, and 8 to continue each project.
General Recommendations & Version Control
- Generally, keep both
<span class="pre">Pipfile</span>and<span class="pre">Pipfile.lock</span>in version control. - Do not keep
<span class="pre">Pipfile.lock</span>in version control if multiple versions of Python are being targeted. - Specify your target Python version in your Pipfile’s
<span class="pre">[requires]</span>section. Ideally, you should only have one target Python version, as this is a deployment tool.<span class="pre">python_version</span>should be in the format<span class="pre">X.Y</span>and<span class="pre">python_full_version</span>should be in<span class="pre">X.Y.Z</span>format. <span class="pre">pipenv</span> <span class="pre">install</span>is fully compatible with<span class="pre">pip</span> <span class="pre">install</span>syntax, for which the full documentation can be found here.- Note that the
<span class="pre">Pipfile</span>uses the TOML Spec.
(https://pipenv-fork.readthedocs.io/en/latest/basics.html)
echo $PATH- copy all the directories that you want included. This is not exactly subjective, you don’t want to remove a directory. You may only want to cut out the duplicate directories.
echo'PATH="/Users/{HOME}/.pyenv/shims:/Users/{HOME}/.pyenv/bin:/usr/local/bin:/usr/bin:/bin:/usr/sbin:/sbin:/Users/{HOME}/.local/bin"' >> ~/.zshrcecho 'export PATH' >> ~/.zshrc- You may want to go back into your
~/.zshrcfile and comment those commands out if you ever install something that needs to add another directory to PATH, so I have done this and preserve this in the file in case I ever find something funny has happened. So, I just go back and uncomment the lines restart the shell which wil reset the PATH.
(I don’t know everything about what I am doing. It is all a black box to me. But I took this opportunity to learn a lot more about my system than I ever understood, previous. It was great but frustrating and there maybe better ways to do some of these steps. But now I have a good basis to investigate other solutions. However, that said, I have gone through my workflow various times and it seems phenomenally easy and bullet proof. But time will tell…..please leave a comment of your own advice.)